Column · @activesubslabinsight
Why Active Sub-Slab Depressurization Is the Gold Standard for Radon Mitigation
If you own a home with a concrete slab foundation and you have tested for radon, you have probably seen a number on a lab report that made your stomach drop. Radon is a radioactive gas that moves up through the soil and into the lowest level of a house. In St. Louis, which sits in an EPA radon zone with moderate to high potential, this is not a rare problem. Over the years I have worked on dozens of homes here, and the most reliable fix for slab-on-grade houses is a technique called active sub-slab depressurization.
I remember one house in Kirkwood where the owner had been living with a radon level of 12 pCi/L for years. They had tried sealing cracks and opening windows, but the readings barely budged. When I finally installed an active sub-slab depressurization system, the post-mitigation test came back at 1.8 pCi/L. That kind of drop is not unusual. It is what happens when you create a negative pressure field beneath the slab and vent the gas safely above the roofline.
How It Works Under the Slab
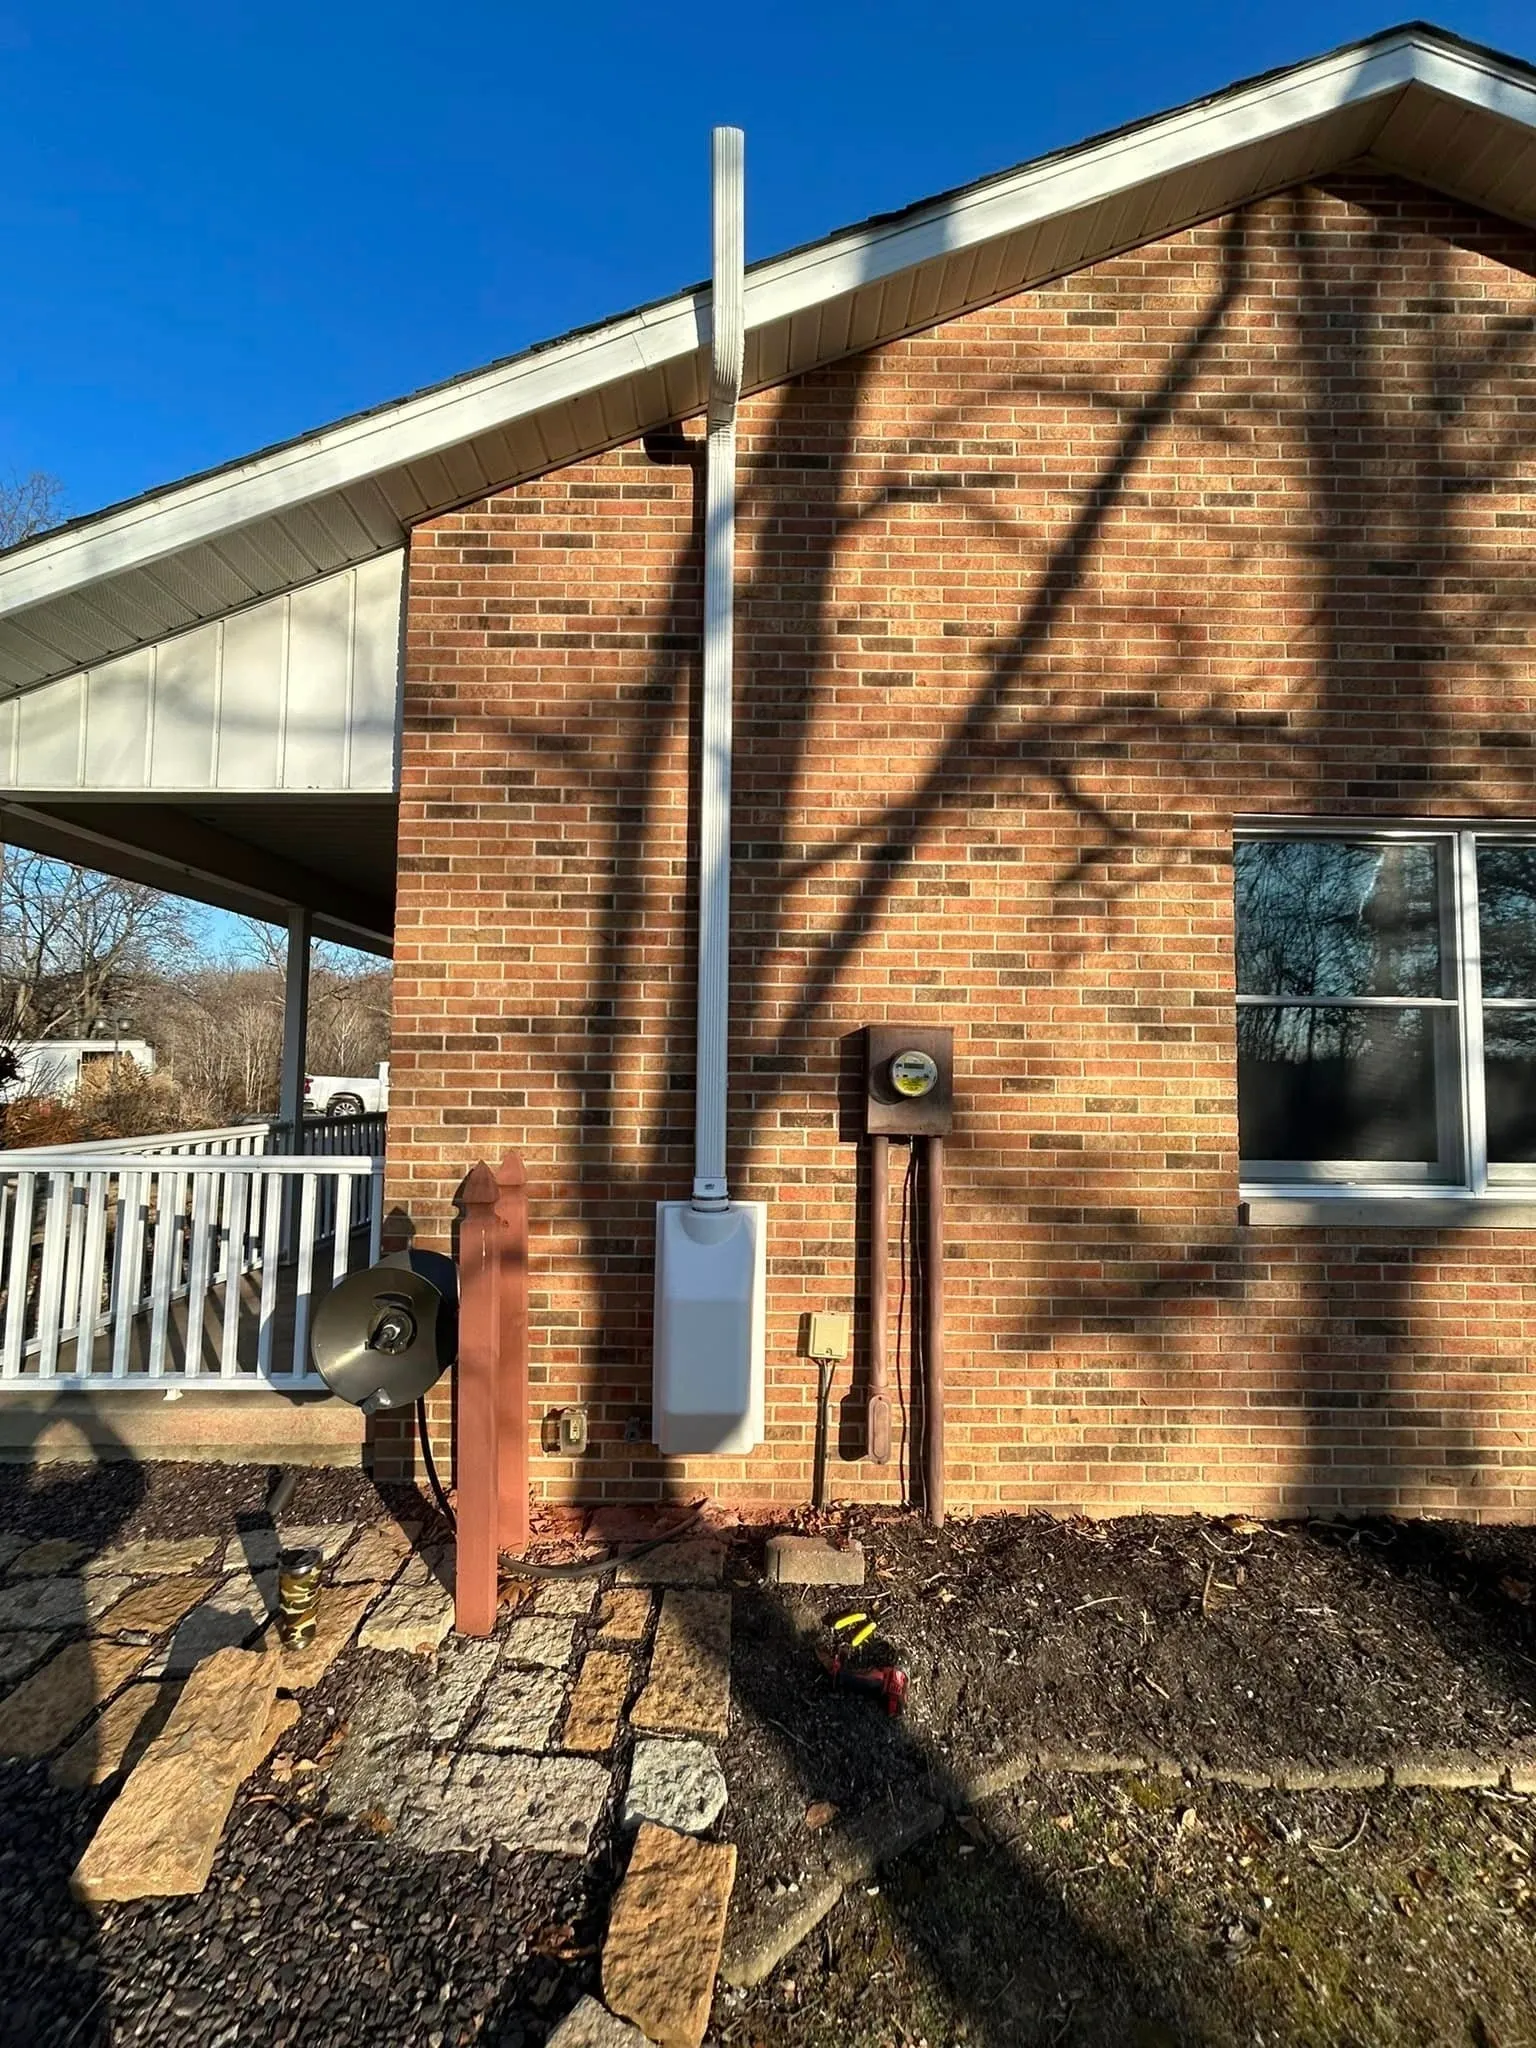
The basic idea behind sub-slab depressurization is straightforward. You drill one or more suction points through the concrete slab, insert a length of perforated pipe into the gravel layer below, and seal the hole around the pipe with a quality sealant. Then you connect that pipe to a radon fan, usually mounted outside or in an attic, which pulls air from beneath the slab and exhausts it above the roof. The fan runs continuously, creating a negative pressure zone that prevents soil gas from entering the house envelope.
There are passive systems that rely on natural air movement and the stack effect, but they are far less reliable in most homes. Active sub-slab depressurization uses a mechanical fan, so it works regardless of weather or indoor temperature differences. That is why the EPA and most radon professionals recommend it as the primary method for slab foundations. The fan is sized to the house, the soil type, and the number of suction points, so you get consistent performance year round.
Why St. Louis Homes Need This Approach
St. Louis sits in an area where the underlying geology includes limestone, shale, and glacial till. These materials can hold pockets of radon gas that migrate upward through the soil. I have tested homes in Clayton, Webster Groves, and South City where the radon levels varied wildly from one house to the next, even on the same street. That is because the soil permeability and the condition of the slab make a big difference. A cracked slab with poor perimeter sealing can let radon in even if the neighbor has no problem.
Active soil depressurization, of which sub-slab depressurization is the most common type, addresses the root cause. It does not try to block every crack. Instead it reverses the pressure gradient so the house stays at a slightly higher pressure than the soil below. As long as the radon fan runs and the suction point is properly placed, the gas never makes it through the concrete slab in the first place.
Key Components That Matter
A well-built system depends on a few critical parts. The radon fan itself must be rated for continuous operation and should be mounted in a location where it stays protected from weather but still accessible for maintenance. I have seen fans fail early because they were installed in a damp crawlspace without proper drainage. The suction point needs a solid connection to the gravel, and the pipe should be perforated in the section that sits below the slab. Solid pipe above the slab prevents leaks.
You also need a way to check that the system is working. A manometer, typically a U-tube manometer, is installed on the pipe above the slab. It shows the pressure difference between the inside of the pipe and the room air. When the fan is running, the liquid in the tube sits at different heights, and that tells you the system is drawing negative pressure. If the levels equalize, something is wrong: a clogged pipe, a failed fan, or a break in the seal.
Every installation should include a post-mitigation test. That means running the system for at least 24 hours and then placing a radon test kit in the lowest livable area. The test must be done with the system running, and the results should be below 4 pCi/L, ideally below 2. The EPA recommends action at 4, but many homeowners aim lower for peace of mind.
Variations for Different Foundations
Not every house has a clean concrete slab. Some have a crawlspace with a dirt floor or a thin layer of gravel. In those cases, sub-slab depressurization does not work because there is no slab to seal against. Instead you use sub-membrane suction, where you lay a heavy plastic vapor barrier over the dirt, seal it to the walls, and pull the gas from under the membrane. The principle is the same: active suction removes the soil gas before it can enter the living space.
Crawlspace mitigation is more labor intensive because you have to clean the area, lay the membrane, and seal every seam. But the results can be just as good. I once did a crawlspace house in Maplewood where the radon level dropped from 8.6 to 1.2 pCi/L after a proper sub-membrane system was installed. The homeowner said they could finally use the basement for a home gym without worrying about the air.
Common Mistakes and Trade-Offs
The biggest mistake I see is undersizing the fan or using too few suction points. One suction point might work for a small slab with good gravel, but a large house or a slab with clay underneath may need two or three points. Another problem is poor sealing around the pipe penetration. If the sealant cracks or was not applied correctly, the system loses vacuum and draws air from the room instead of from below the slab. That wastes energy and reduces effectiveness.
There is also the question of where to vent the exhaust. The fan outlet must be above the roofline and away from windows, doors, and air intakes. I have seen systems where the exhaust was too low, and the radon gas was pulled back into the house through an open window. That is a code violation and a health risk. Proper discharge height is non-negotiable.
Cost is another consideration. An active sub-slab depressurization system typically runs between $1,000 and $2,500 depending on the house size and complexity. That is not cheap, but it is a one-time investment that lasts for years if maintained. The fan has a warranty of five to ten years, and the rest of the system is mostly PVC pipe and sealant, which does not wear out. Compare that to the cost of a radon test kit every few years or the health risks of long-term exposure, and the value becomes clear.
Is It Right for Every House?
Not every house needs active sub-slab depressurization. Some homes with very low radon levels can get by with passive venting or simple sealing. But if you test above 4 pCi/L, and especially if you are above 8, this is the method that gives the most consistent results. The EPA and the Radon Mitigation Standards recommend it as the first choice for slab foundations. In my experience, it is the only method that gives homeowners real peace of mind, because the manometer provides a constant visual check that the system is working.
I have seen too many people spend money on sealing products and ventilation tricks only to retest and find the levels unchanged. Radon does not care about caulk or open windows on a calm day. It moves with pressure, not with luck. Active sub-slab depressurization changes the pressure, and that is why it works.
If you are in the St. Louis area and you are considering radon mitigation, start with a test. Use a radon test kit from a certified lab, or hire a professional like Air Sense Environmental to do the testing and installation. The right system, properly installed and verified with a post-mitigation test, will protect your home for decades. And that is worth more than any quick fix.